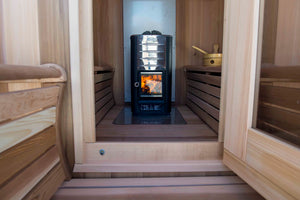

Saunas are a great way to relax and unwind after a long day, but controlling the temperature and settings can be a hassle. That's where the UKU sauna controller comes in. This innovative device allows you to control your sauna remotely with the HUUM app, making it easier than ever to set the perfect temperature and lighting for your sauna experience.
Step 1: Check Your Components
Before you begin installing your UKU sauna controller, make sure you have all the necessary components. Your UKU should include the wall-mounted controller, the main module, the temperature sensor, two cables for the temperature sensor and door switch, and one slightly longer cable for the wall-mounted controller. You'll also need your own power drill, cable stripper, cutting pliers, screwdriver, and marking pen.
Step 2: Choose the Right Spot for the Thermostat
The first step in installing your UKU sauna controller is choosing the right spot for the thermostat. Temperature is not evenly distributed inside a sauna, so it's important to choose a spot that measures the actual temperature of the heat that you and your guests will be enjoying. We recommend putting the sensor at least half a meter from any distorting factors and as close as possible to where you'll be sitting.
Step 3: Attach the Door Sensor
The door sensor is what automatically shuts off the heater when the door is opened. You need to put the sensor on the side of the door where it opens and also low down so it's not noticeable and the heat doesn't loosen the attachment. First, drill a hole into the door frame where the sensor will go. It must be just deep enough to allow the door to fully close.
Step 4: Connect the Cables for the Wall-Mounted Controller
Now it's time to connect the cables for the wall-mounted controller. Just make sure you carefully match up the right-numbered cables here. This is the most common source of the problem when people think their heaters might not be working. In some controllers, for example, the numbers run backwards, which some people don't notice. We recommend that you take a picture of the wiring configuration after it's finished, just in case there are any issues in future.
Step 5: Find a Suitable Spot for the Main Module
The main module needs to be somewhere that doesn't get hotter than 50 degrees Celsius and doesn't get more than 95% humidity. We don't really recommend putting it inside the hot room if you can help it, but some people do if it's the only suitable space they've got available. If so, just make sure it's about 10 to 50 centimeters from the floor and as far away from the heater as possible.
Step 6: Connect the Power Cable to the Main Module
Once you've found a suitable spot for the main module, you can now connect the power cable to the cable screws on the UKU control panel before fixing it to the wall. For that, simply take away the dial in the middle. Then you can attach the device to the wall with screws behind that before replacing the dial again.
Step 7: Optional - Connect Lights or Ventilation
Connecting lights or ventilation is optional, but it's a great added extra. You can choose one of these at a time, then connect it to the LL-LN outputs on the control console.
Step 8: Test the System
Now that everything is connected, it's time to test the system to ensure everything is working properly. Start by simply turning on the screen of the wall-mounted controller, spinning the dial to choose a temperature, then pressing it to start the heating process. You'll know pretty quickly if it's working, because the heating elements will glow red and emit heat quite fast. There's no need to touch it, otherwise you might burn yourself. Don't forget, the sauna door has to be closed for this to work.
Step 9: Connect UKU to Wi-Fi or GSM
If you have UKU Wi-Fi or UKU GSM, you can now connect it to the network. Remember, it's only the main module in the UKU system that you've just installed that has to be within the signal range, but then you can use your app from anywhere. Hold the main button down for 10 seconds and that will bring up the settings menu. Go to Wi-Fi settings, then select SSID. You'll then see a list of Wi-Fi networks within range, so just select yours. Then enter your password. Then click connect and follow any additional instructions on screen.
Step 10: Use the HUUM App to Control the Sauna
To use the HUUM app to control your sauna, start by downloading the app from the Apple App Store or Google Play. To sign up, fill out some basic details and insert your sauna ID and code, which can both be found printed on your main module. You can change these inside the app if you want. Once you're signed in, you can select your target temperature by scrolling around the circle interface that has the actual temperature inside. You can also turn on the child lock feature to prevent accidental activation by children.
Conclusion
Installing the UKU sauna controller is a straightforward process that can be completed in just a few steps. By following this guide, you'll have a fully functional UKU sauna controller and be ready to enjoy your sauna experience like never before. Whether you're looking to relax after a long day or rejuvenate your body and mind, the UKU sauna controller makes it easier than ever to set the perfect temperature and lighting for your sauna experience.
With UKU, you can control your sauna experience remotely through the HUUM app, which allows you to set the perfect temperature and lighting from anywhere. The UKU system includes a wall-mounted controller, the main module, temperature sensor, two cables for the temperature sensor and door switch, and one slightly longer cable for the wall-mounted controller.