
Dreaming of a cozy backyard retreat? Building your own barrel sauna can turn that fantasy into a reality. With a bit of DIY spirit and these fundamental steps, you'll be well on your way to creating a unique and inviting sauna experience. Sauna construction might seem like a daunting task, but our step-by-step process below will guide you through it.
The Process of Building a Barrel Sauna
You might be surprised to know that you can build your own barrel sauna in as few as 12 steps. Let’s take a look at each of these in more detail below.
1. Gather Your Materials
Before you begin, ensure you have all the necessary materials. You'll need sauna staves (pre-cut and shaped wooden planks), metal bands (hoops) to hold the staves together, a solid sauna door, sauna benches, and insulation materials.
2. Plan Your Location
Choose a suitable spot in your backyard for your barrel sauna. Ensure the ground is level and stable. Consider the sauna's orientation for optimal sunlight and views.
3. Lay the Foundation
Create a stable foundation, which can be a concrete slab or wooden deck. This foundation will support the weight of the sauna and ensure it remains level.
4. Assemble the Barrel Structure
Start by laying out the staves in a circular pattern, securing them with the metal bands as you go. Ensure the staves are evenly spaced and level. You may need assistance with this step.
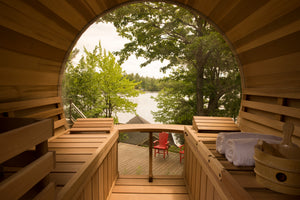
5. Install the Benches
Inside the barrel sauna, attach the benches to the curved interior walls. Ensure they are securely anchored to provide stability.
6. Insulate the Sauna
Proper insulation is crucial for heat retention. Line the interior walls with insulation materials, such as fiberglass or mineral wool. Cover the insulation with sauna paneling for a finished look.
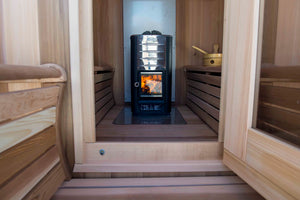
7. Add the Heating Element
Install the sauna heater or stove according to the manufacturer's instructions. Ensure it complies with safety regulations and allows for proper ventilation.
8. Seal the Sauna
To prevent heat loss and moisture buildup, seal any gaps or joints in the sauna. This step is essential for maintaining an efficient and comfortable sauna experience.
9. Install the Door
Mount a sturdy, well-insulated door that can withstand high temperatures. Ensure it fits snugly to maintain heat inside the sauna.
10. Add Ventilation and Lighting
Include ventilation to maintain air quality and prevent excess humidity. Install sauna-friendly lighting to create the right ambiance.
11. Customize with Final Touches
Consider personalizing your sauna with additional features like windows, thermometers, or timer controls. These add-ons can enhance your sauna experience.
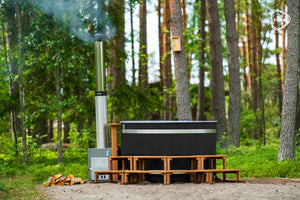
12. Enjoy Your Oasis
Once your barrel sauna is complete, it's time to savor the fruits of your labor. Invite friends and family to share in the relaxation and wellness benefits of your backyard oasis.
Building a barrel sauna is a rewarding DIY project that adds value and comfort to your outdoor space. With careful planning and attention to detail, you can create a unique retreat where you can unwind and rejuvenate year-round.
READ MORE ABOUT HOW TO BUILD A SAUNA HERE!